Hibiscus plants are beloved for their
vibrant blooms and lush foliage, making them a favorite among home gardeners.
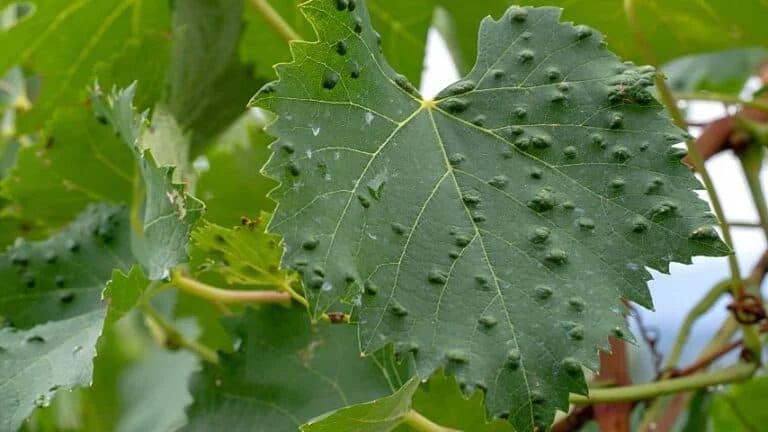
However, many plant owners have encountered a common yet concerning issue: bumps on hibiscus leaves. Whether
you’ve noticed white bumps on hibiscus
leaves, yellow spots, or unusual
growths on hibiscus buds,
understanding the underlying causes is essential for maintaining a healthy
plant.
In this comprehensive guide, we'll explore what causes bumps on hibiscus leaves,
how to treat them effectively, and preventative measures to ensure your
hibiscus stays in top shape.
What Causes Bumps on Hibiscus Leaves?
If you've ever wondered, "Why are there
bumps on my hibiscus leaves?"
you're not alone. These bumps can result from various environmental,
pest-related, or disease-related issues. Let’s break down the most common
causes:
1. Aphid Infestation:
One of the most common culprits behind bumps on hibiscus leaves is an
infestation of aphids on hibiscus.
These tiny insects feed on plant sap, weakening the plant and causing leaf
deformation. As they suck sap, the leaves may develop small bumps or curls, and new growth may appear stunted.
Look closely under the leaves and around the
buds. If you see clusters of green, black, or white insects, you likely have hibiscus aphids.
2. Edema (Oedema):
Edema occurs when the plant absorbs more
water than it can transpire, leading to water-filled cells bursting and forming
blister-like bumps on hibiscus leaves.
These bumps may appear on the underside of the leaves and can turn corky or
scabby as they mature.
Edema is often caused by overwatering, poor
drainage, or high humidity, especially when coupled with low light.
3. Fungal or Bacterial Infections:
Fungal leaf spots, such as Cercospora or Anthracnose, can result in yellow
bumps on hibiscus leaves or irregularly shaped spots on hibiscus leaves. These spots can range in color from
yellow and brown to black, often surrounded by a halo.
If left untreated, these infections can
spread rapidly, causing defoliation and weakening the plant.
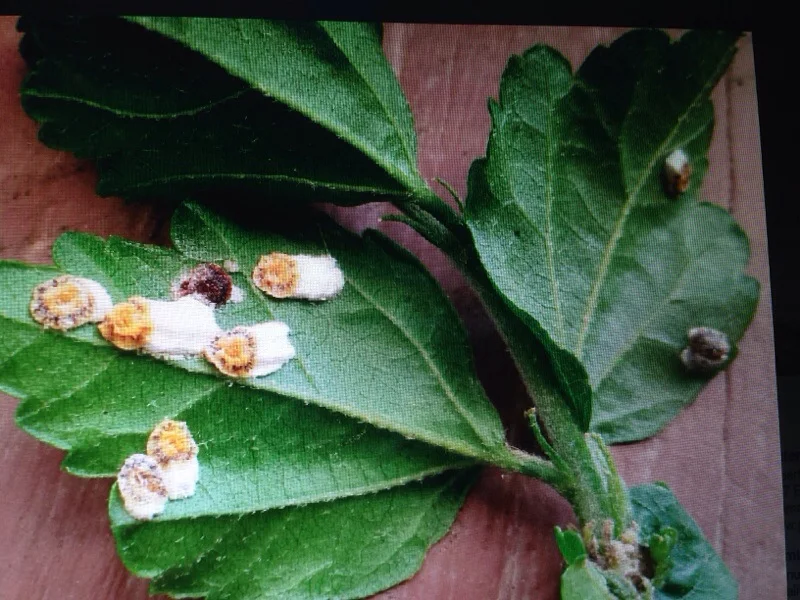
4. Pest Residue and Scale Insects:
Some white
bumps on hibiscus leaves may not be part of the plant at all. Whiteflies, scale insects, and mealybugs
can leave behind waxy or cotton-like residues that resemble bumps. Scale insects, in particular, attach
themselves to the plant and suck sap, causing yellowing and bumps on leaves and
bumps on hibiscus buds.
Symptoms to Watch For:
When diagnosing bumps on hibiscus, observe the plant carefully. Common symptoms
include:
- Raised bumps
on the upper or lower side of leaves
- Discolored spots,
especially yellow or brown
- Curling leaves
or distorted new growth
- Presence of sticky residue (honeydew) or sooty mold
- Clusters of tiny insects on leaves or buds
Identifying the symptoms accurately will
help you choose the right treatment method.
How to Treat Bumps on Hibiscus Leaves:
1. Use Neem Oil on Hibiscus:
One of the most effective and organic
solutions for pest-related bumps is neem
oil on hibiscus. Neem oil acts as a natural insecticide and antifungal
treatment. It works by disrupting the life cycle of pests like aphids on hibiscus, whiteflies, and mealybugs.
How to Apply Neem Oil:
- Mix 1 teaspoon of neem oil with 1 quart of
water and a few drops of mild dish soap.
- Spray thoroughly on affected areas, including
the underside of leaves.
- Repeat every 7–10 days until pests are gone.
2. Improve Watering Practices:
If edema is the cause, reassess your
watering habits. Avoid overwatering and ensure your hibiscus is in
well-draining soil. Water early in the day so excess moisture can evaporate,
and avoid misting the plant in humid environments.
3. Prune
Infected Leaves:
Remove and dispose of heavily infected
leaves or buds showing signs of fungal infection. Use sterilized pruning shears
and avoid composting diseased material to prevent spreading pathogens.
4. Apply Fungicides:
For persistent fungal issues, use a
copper-based fungicide or horticultural oil. Always follow the label
instructions, and avoid spraying in extreme heat or direct sunlight to prevent
leaf burn.
5. Encourage Beneficial Insects:
Introducing natural predators like ladybugs
or lacewings can help control hibiscus
aphids and other pests. These beneficial insects feed on harmful pests,
providing a long-term, chemical-free solution.
Prevention Tips for Healthy Hibiscus:
1. Inspect Regularly:
Frequently check your hibiscus for early
signs of bumps on the hibiscus leaf,
pests, or discoloration. Early detection makes treatment more effective and
prevents widespread damage.
2. Maintain Good Air Circulation:
Ensure your plant has adequate spacing and
airflow. Crowded plants in humid conditions are more prone to fungal issues.
3. Use Mulch Cautiously:
While mulching helps retain soil moisture,
excessive mulch can increase humidity around the plant’s base, encouraging
fungal growth. Keep mulch a few inches away from the stem.
4. Avoid Over-Fertilizing:
Excessive nitrogen can lead to rapid but
weak growth that attracts pests. Use a balanced, slow-release fertilizer suited
for hibiscus plants.
5. Quarantine New Plants:
Before introducing new plants to your garden
or indoor space, inspect and quarantine them to avoid spreading pests or
diseases to your hibiscus.
Final Thoughts:
Bumps on hibiscus leaves
can be alarming, but with the right approach, your plant can recover and
thrive. Whether you're dealing with white
bumps on hibiscus leaves, aphids on
hibiscus, or other signs of stress, identifying the root cause is key.
Implementing natural solutions like neem
oil on hibiscus, adjusting care routines, and monitoring plant health
regularly will help prevent future outbreaks.
By staying vigilant and proactive, you can
keep your hibiscus beautiful, healthy, and blooming for seasons to come.


.jfif)


